Changing your scooter tire from a tube to a solid tire is a game-changer. Not only does it improve your scooter’s durability, but it also enhances your ride’s stability and reduces the risk of flat tires. In this article, we will walk you through the entire process—from understanding why you should make the switch to solid tires, to the detailed steps involved in replacing your scooter tire. We’ll also provide valuable tips on how to maintain your new solid tires, troubleshoot issues, and compare them to tube tires.
1. Why You Should Consider Changing Your Scooter Tire from Tube to Solid
Here’s the deal: switching from tube tires to solid tires could make all the difference in how you ride. So why should you even bother making the change? Solid tires offer a wide range of benefits that you won’t get with traditional tube tires. What’s the real story? For starters, solid tires are puncture-proof, meaning you’ll never have to deal with a flat tire again. This can be a massive time-saver and headache reducer.
In addition to eliminating the risk of punctures, solid tires offer enhanced stability and durability. But here’s the kicker—they require less maintenance. You won’t need to worry about tire pressure, punctures, or tire wear as much as you would with traditional tube tires. This makes them ideal for individuals who want a hassle-free experience. This is where it gets interesting—they can also improve the performance of your scooter by offering more consistent traction on different surfaces.
When it comes to cost, solid tires are often more expensive upfront, but they pay for themselves over time due to their longevity. Ready for the good part? Solid tires last much longer than tube tires, so you’ll spend less money on replacements in the long run. These tires are designed to withstand wear and tear, even in harsh weather conditions. They are perfect for those who want to avoid frequent tire changes and focus more on enjoying the ride.
2. Tools You’ll Need for the Job
Changing a scooter tire isn’t as difficult as it may sound, but you’re going to need the right tools. First off, you’ll need a tire lever to help remove the old tire. These levers are designed to pry the tire off the rim with ease, making your job much simpler. Here’s the twist—you’ll also need a valve core remover to help remove the valve from the old tube if you’re switching from tube tires.
Now, it’s not just about the basic tools. What’s the real story? You’ll need a few additional items to make sure your tire swap goes smoothly. For example, a tire inflator is essential for checking the pressure on your solid tire once it’s installed. So, let’s talk specifics. A good quality pump will ensure that your solid tire is installed correctly and ready for use. Without it, you could run into issues with improper fitting or inflation.
Another item to keep in mind is the appropriate-sized wrench. You’ll need it to remove the wheel from your scooter. But here’s the kicker—if your scooter uses bolts or screws to hold the wheel in place, you’ll need a ratchet wrench to remove them effectively. Additionally, a pair of gloves is a must-have. While it may seem like an insignificant detail, gloves will protect your hands from getting dirty or injured during the tire replacement process.
Here’s a breakdown of the tools you’ll need:
| Tool | Purpose |
|---|---|
| Tire Lever | Removes the old tire from the rim |
| Valve Core Remover | Helps remove the valve from the tube |
| Tire Inflator | Ensures correct tire inflation |
| Ratchet Wrench | Used to remove wheel bolts or screws |
| Gloves | Protects hands during tire replacement |

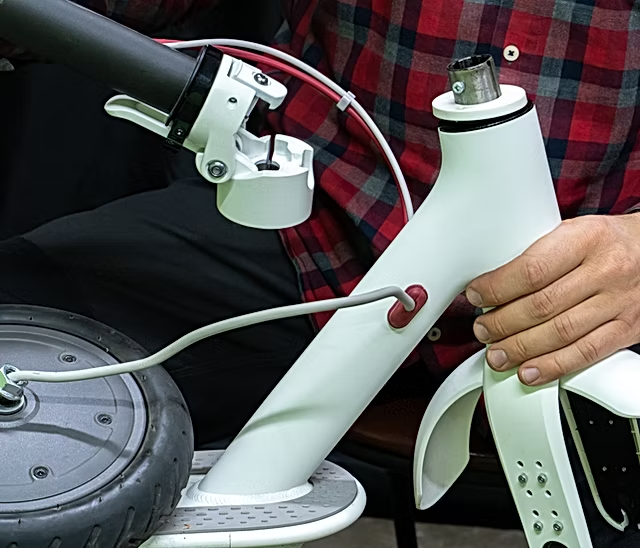
3. How to Prepare Your Scooter for Tire Replacement
Before diving into the tire replacement process, let’s make sure you’re fully prepared. First things first, you’ll need to elevate your scooter. What’s the real story? You can use a scooter stand or a jack to lift the scooter safely off the ground. If you don’t have a dedicated scooter lift, a basic car jack will work in a pinch. But here’s the kicker—make sure the scooter is stable once it’s lifted to prevent it from tipping over.
Next up, you need to secure the scooter to ensure it doesn’t move during the replacement process. Ready for the good part? Place the scooter on a flat surface and use a strap or clamp to keep it steady. You’ll also want to remove any obstructions, such as the scooter’s footrest, that might get in the way while you’re working on the tires.
Once your scooter is safely elevated and secured, this is where it gets interesting—you can start removing the old tire. It’s important to deflate the tube completely if you’re switching from a tube tire. So here’s the twist—use your valve core remover to release all the air from the tube. This will make the tire easier to remove and will prevent any pressure buildup while you’re working.
| Preparation Step | Description |
|---|---|
| Lift the Scooter | Use a stand or car jack to elevate the scooter |
| Secure the Scooter | Clamp or strap the scooter to prevent movement |
| Deflate the Tire | Use a valve core remover to release air pressure |

4. Step-by-Step Guide: Removing the Old Tube Tire
Now, let’s get into the actual removal of the old tire. But here’s the kicker—you need to be careful when removing the tire to avoid damaging the rim. First, you’ll need to start by using your tire lever. What’s the real story? Insert the tire lever between the tire and rim and gently pry it off. If it’s too tight, use two levers at opposite sides to help release the tire. Ready for the good part? Work your way around the rim slowly to avoid bending or warping the tire.
Once you’ve successfully removed the tire, you’ll be able to inspect the rim for any damage. This is where it gets interesting—check the rim for any sharp edges or cracks. These can damage the new solid tire, leading to issues down the line. If you find any damage, it’s best to replace the rim before installing the new tire.
Next, remove any remaining pieces of the old tube that might be stuck inside the tire. Here’s the twist—give the rim a quick wipe-down to remove any dirt or debris that could cause problems during installation.
| Removal Step | Description |
|---|---|
| Use Tire Lever | Pry the tire from the rim carefully |
| Inspect the Rim | Check for cracks or sharp edges |
| Clean the Rim | Wipe the rim to remove dirt and debris |
5. Selecting the Right Solid Tire for Your Scooter
Choosing the right solid tire for your scooter is crucial to ensuring a smooth ride. So what’s the real story? Solid tires come in various sizes and materials, so it’s important to select the one that fits your scooter’s specifications. But here’s the kicker—if you choose the wrong size, you could end up with a tire that’s difficult to install or, worse, unsafe to ride.
The first step is to check your scooter’s tire size. Ready for the good part? Look at the sidewall of your old tube tire, where you’ll find the tire dimensions. These numbers tell you the exact size of the tire you need to purchase. What’s the real story? Some scooters use specialized tires that are only available through specific brands, so be sure to double-check your scooter’s manual for compatibility.
Once you’ve identified the correct size, you can start comparing solid tires. This is where it gets interesting—consider the material of the solid tire. Some solid tires are made from polyurethane, while others use rubber compounds for a smoother ride. Here’s the twist—rubber tires tend to provide better shock absorption, making them ideal for bumpy roads.
| Tire Size | Material Type | Compatibility | Price Range |
|---|---|---|---|
| 8.5″ | Polyurethane | Universal | $30-$50 |
| 10″ | Rubber | Scooter X1 | $50-$80 |
| 12″ | Polyurethane | Scooter Y2 | $40-$60 |

6. Preparing the New Solid Tire for Installation
Before installing your new solid tire, it’s important to do a little prep work. What’s the real story? Start by checking the tire for any defects or damage. Even brand-new tires can sometimes have manufacturing defects, so it’s crucial to inspect the tire thoroughly before installation. Ready for the good part? Ensure the tire’s tread is even and there are no visible cuts or punctures.
Next, you’ll want to clean the rim of your scooter to ensure a tight fit. But here’s the kicker—make sure the rim is completely free of dirt or debris. Any foreign material left on the rim can interfere with the tire’s fit, leading to instability or even an unsafe ride. What’s the real story? Use a soft cloth and mild soap to clean the rim, and make sure it’s dry before proceeding.
Once the rim is clean and dry, this is where it gets interesting—you can now install the new solid tire. The process for installing solid tires is slightly different from tube tires because the tire doesn’t require air pressure. So here’s the twist—you need to make sure the tire is seated evenly on the rim.
| Preparation Step | Description |
|---|---|
| Inspect the New Tire | Check for defects or damage |
| Clean the Rim | Wipe the rim to remove dirt and debris |
| Install the Solid Tire | Fit the tire evenly onto the rim |
7. Step-by-Step Guide: Installing the Solid Tire
Installing your new solid tire is the most exciting part of the process. What’s the real story? You’re finally ready to see your scooter perform at its best. So here’s the twist—start by aligning the solid tire with the rim. Make sure it’s centered and properly aligned before pressing it into place. Ready for the good part? Once the tire is aligned, use your hands or a tire press to push the tire onto the rim.
It’s important to ensure that the tire is seated evenly. This is where it gets interesting—check both sides of the tire to make sure it’s flush with the rim. If the tire is uneven, it could cause issues with the ride, such as wobbling or poor traction. But here’s the kicker—you may need to apply some force to get the tire fully seated, but don’t force it too much or you could damage the rim or tire.
Once the tire is in place, what’s the real story? You’ll need to test it to ensure it’s secure. Spin the wheel and check for any wobbling or misalignment. If everything looks good, you can move on to the next step—reinstalling the wheel on your scooter.
| Installation Step | Description |
|---|---|
| Align the Solid Tire | Make sure the tire is centered on the rim |
| Seat the Tire | Use hands or a press to secure the tire in place |
| Test the Tire | Spin the wheel and check for any wobbling |

8. Ensuring a Proper Fit and Alignment
Now that your solid tire is installed, it’s important to check the alignment. What’s the real story? A misaligned tire can cause uneven wear, poor handling, and even safety issues. Ready for the good part? Start by checking the tire’s position on the rim. It should be seated evenly, with no bulging or gaps. If you notice any issues, remove the tire and realign it carefully.
Another crucial step is checking the wheel alignment. But here’s the kicker—make sure the wheel is properly aligned with the scooter’s frame. Misaligned wheels can cause uneven wear on the tire and affect the overall performance of the scooter. What’s the real story? If you’re unsure about the alignment, it’s a good idea to consult a professional for help.
| Alignment Step | Description |
|---|---|
| Check Tire Seating | Ensure the tire is flush with the rim |
| Align the Wheel | Ensure the wheel is properly aligned with the frame |
9. Common Mistakes to Avoid When Changing Scooter Tires
There are several mistakes you can easily make when changing your scooter tire. So what’s the real story? First, not properly securing the scooter can lead to safety hazards. Make sure the scooter is stable before you begin. But here’s the kicker—another common mistake is using the wrong tools. It’s important to use the correct tire lever, wrench, and valve remover for the job. Ready for the good part? Using improper tools can damage your tire or scooter and cause delays in the process.
Another mistake to avoid is not checking the rim before installing the new tire. What’s the real story? If your rim is damaged, your new solid tire won’t fit properly. Make sure the rim is clean and free of any sharp edges or cracks before installation. Lastly, don’t rush the installation process. This is where it gets interesting—take your time and make sure everything is aligned and secure before riding.
| Mistake | Description |
|---|---|
| Not Securing the Scooter | Ensure the scooter is stable before starting |
| Using Incorrect Tools | Use the right tools to avoid damage |
| Rushing the Installation | Take your time to ensure a proper fit and alignment |
10. How to Maintain Solid Tires for Longevity
Now that you’ve installed your solid tires, what’s the real story? Maintenance is crucial to ensure their longevity. But here’s the kicker—you don’t have to do much to maintain solid tires. Unlike tube tires, you don’t need to worry about tire pressure. Ready for the good part? Just inspect the tires regularly for any signs of wear or damage. If the tread starts to wear down, it’s time to replace the tire.
In addition to regular inspections, this is where it gets interesting—you should also clean your solid tires occasionally. Dirt and debris can build up, which may cause your tires to wear out faster. What’s the real story? A quick rinse with water and a soft brush will keep your tires in top condition.
| Maintenance Tip | Description |
|---|---|
| Regular Inspections | Check for any signs of wear or damage |
| Cleaning | Rinse with water and use a soft brush |
| Replace Worn Tires | Replace tires when the tread starts to wear down |
11. Troubleshooting Tire Issues After Installation
Even after installing solid tires, you might encounter a few issues. What’s the real story? The most common problem is a wobbling tire, which can occur if the tire isn’t seated properly. But here’s the kicker—if you notice any wobbling, stop riding and check the tire alignment immediately. Another common issue is poor traction, especially if the tire isn’t compatible with the type of terrain you ride on.
Ready for the good part? If you notice air leakage or other issues, check the rim for cracks or debris that might be causing the problem. What’s the real story? Sometimes, it’s just a matter of adjusting the tire’s fit to ensure a better seal.
| Troubleshooting Step | Description |
|---|---|
| Check for Wobbling | Adjust the tire’s alignment if needed |
| Inspect for Air Leakage | Check the rim for cracks or debris |
| Adjust Tire Fit | Ensure the tire is properly seated |
12. Cost Comparison: Tube vs. Solid Tires
When considering the switch from tube tires to solid tires, you might be wondering about the cost. What’s the real story? Solid tires typically come with a higher upfront cost compared to traditional tube tires. However, when you consider the longevity and lack of maintenance required, solid tires can end up being more cost-effective over time. Ready for the good part? Tube tires need to be replaced more frequently, and the risk of a flat tire can cause additional costs related to emergency repairs.
But here’s the kicker—solid tires can last much longer than tube tires, meaning you’ll spend less on replacements. What’s the real story? In the long run, solid tires offer better value, even though they may be more expensive initially.
| Tire Type | Initial Cost | Maintenance Costs | Average Lifespan |
|---|---|---|---|
| Tube Tires | $15-$30 | Higher (frequent repairs) | 6-12 months |
| Solid Tires | $30-$60 | Lower (no repairs) | 2-3 years |
13. When Should You Replace Your Solid Tires?
Solid tires are designed to last a long time, but what’s the real story? They don’t last forever. Ready for the good part? The best time to replace solid tires is when you notice significant wear on the tread. If the tread has worn down to the point where it no longer provides sufficient grip, it’s time to make the switch. But here’s the kicker—if you notice cracks or other damage to the tire, replace it sooner rather than later to avoid safety risks.
Another key indicator that it’s time to replace your solid tire is any visible deformation or bulging. What’s the real story? A bulging tire can affect the balance of your scooter and cause uneven wear.
| Replacement Indicator | Description |
|---|---|
| Worn Tread | When tread is significantly reduced |
| Visible Cracks or Damage | Replace if there are visible cracks or deformities |
| Bulging Tire | Bulging tires affect balance and performance |
14. Conclusion
To sum up, switching from tube tires to solid tires is a fantastic decision for anyone looking to improve their scooter’s performance and longevity. What’s the real story? Solid tires provide several benefits over tube tires, including increased durability, reduced risk of punctures, and less maintenance. They may cost more initially, but they offer great value in the long run due to their extended lifespan.
But here’s the kicker—now that you know the steps involved, you’re ready to tackle the tire change on your own. Whether you’re doing it for convenience or performance, solid tires are a great investment. Ready for the good part? Go ahead and make the switch today to enjoy a smoother, more reliable ride.
FAQ Section
Q1: What is the difference between tube and solid scooter tires?
Tube tires have an inflatable inner tube that can be punctured, while solid tires are made from
a solid material that is puncture-proof.
Q2: How does changing to solid tires improve my scooter’s performance?
Solid tires eliminate the risk of punctures and provide better stability, improving the overall performance of your scooter.
Q3: Can I install solid tires on any scooter?
Most scooters can be fitted with solid tires, but make sure the size and specifications match your scooter model.
Q4: How long do solid scooter tires last?
Solid tires can last up to 2-3 years, depending on usage and maintenance, compared to tube tires that require more frequent replacements.
Q5: Do I need professional help to install solid tires?
No, installing solid tires can be done on your own with the right tools and instructions, though you can consult a professional if you’re unsure.